
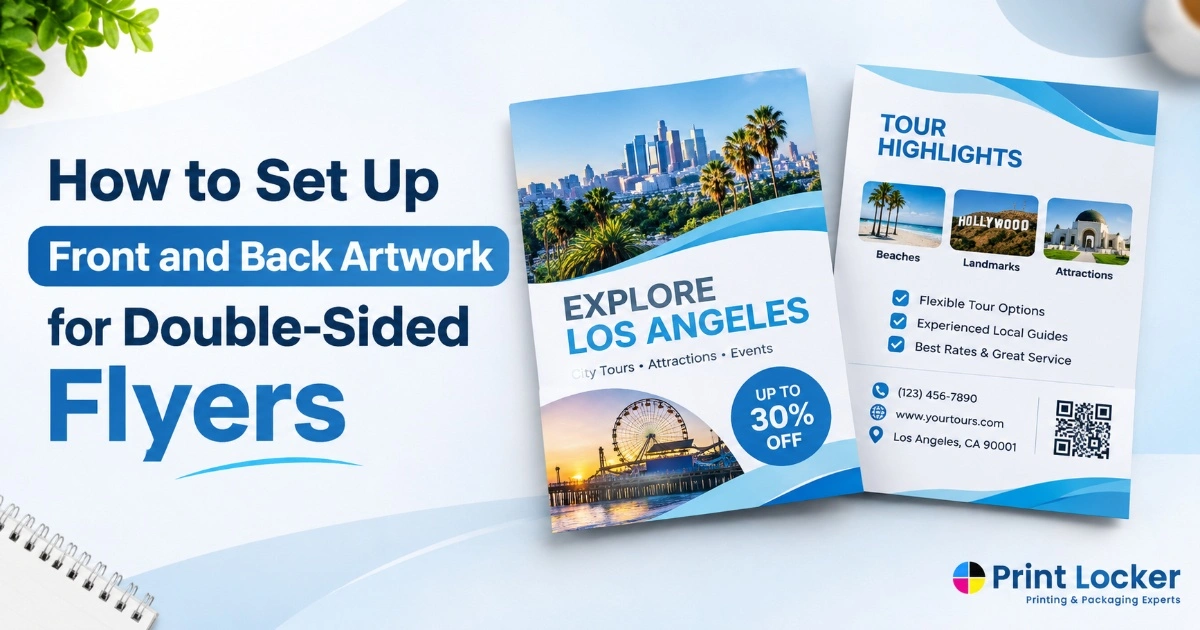
Double-sided flyers provide more room for businesses to communicate information without cluttering the design. You can highlight the most important message on the front and feature additional details, offers and contacts on the back.
Double-sided flyers are often used by restaurants, retail companies, real estate agents and event planners to advertise their product or service. But making artwork for both sides takes a lot of planning. The width, layout, image quality, colors and orientation should all be verified before sending the project to print.
This guide will help you figure out how to work on both sides of the flyer and prepare artwork without mistakes; it can also help you improve the order of your custom flyer printing with PrintLocker.
What Is Double-Sided Flyer Printing?
Double-sided flyer printing means printing different designs or information on both sides of the same sheet of paper. One side is the front, while the opposite side is the back.
On the contrary to single-sided flyers that are printed only on one side, double-sided flyers allow for extra space for details related to products or services offered.
Common uses include:
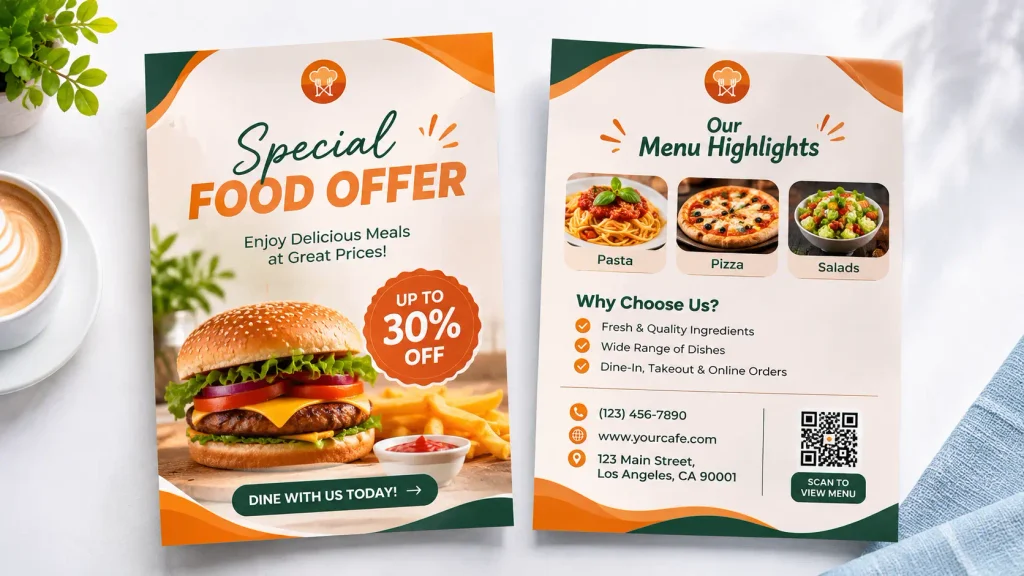
- Restaurant Promotional Flyers: Display a special offer or featured dish on the front and menu highlights, address and contact details on the back.
- Retail Discount Flyers: Highlight major discounts on the front and showcase additional products or promotional terms on the back.
- Real Estate Flyers: Display property photographs and key details on one side, with property features and agent information on the other.
- Event Promotional Flyers: Use the front for the event name and main attraction and the back for schedules, venue details and registration information.
- Business Service Flyers: Introduce the main services on the front and provide descriptions, contact details and additional information on the back.
This format is useful when you have more information to share but still want to keep your promotional material compact and easy to distribute.
What Information Should Go on the Front and Back of a Flyer?
The most effective way to design a double-sided flyer is to give each side a clear purpose. The front should attract attention, while the back should provide useful details.
Front Side: Grab Attention
The front is usually the first side customers see, so keep the main message clear and noticeable.
Include:
- Main Headline: Use a short headline that explains the offer, product, event or service.
- Product or Service Image: Add a clear photograph that supports your main message.
- Special Offers: Highlight important discounts, promotional prices or limited-time deals.
- Business Name or Logo: Make your brand easy to recognize.
- Short Introduction: Add a brief description to explain what you are promoting.
- Call to Action: Encourage readers to visit your store, call your business or explore your website.
Back Side: Provide More Details
Use the back to answer questions that customers may have after reading the front.
Include:
- Product or service descriptions.
- Additional offers and pricing details.
- Business phone number and email address.
- Website and social media information.
- Business address or location.
- QR code linking to a website, menu or booking page.
- Terms and conditions, where necessary.
Example: A restaurant can highlight a Christmas dining offer on the front of its flyer. On the back, it can display popular dishes, menu highlights, restaurant address, booking information and contact details.
How to Set Up Front and Back Artwork for Double-Sided Flyers
Once you have planned the content, prepare the artwork carefully. Follow these steps to create a print-ready design.
Step 1: Set the Correct Flyer Size
Choose the flyer dimensions before starting the design. Common options include:
- A4: Suitable for detailed promotional information, product lists and service descriptions.
- A5: A popular choice for everyday business promotions and handouts.
- DL: A narrow format often used for menus, promotional inserts and compact information.
Keep the front and back artwork at exactly the same dimensions. This helps both sides align correctly during printing and trimming.
Step 2: Create Separate Front and Back Designs
Prepare the front and back as two separate pages or artboards in your design software.
- Place the front artwork on page 1.
- Place the back artwork on page 2.
- Maintain the same page size and orientation.
- Organize the content separately so each side has a clear purpose.
You can use software such as Adobe Illustrator, InDesign or other design tools to prepare your flyer artwork.
Step 3: Set Up Bleed and Safe Margins
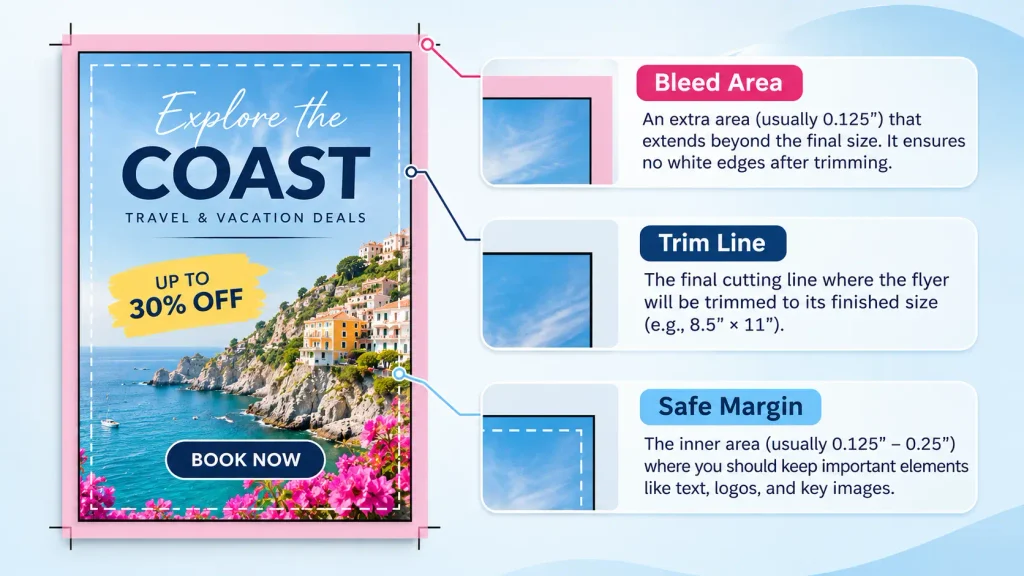
Bleed refers to any artwork that goes over the edges of the flyer. This additional bleed allows for any slight misalignment of the paper during the cutting phase to avoid having white gaps around the border of the flyer.
The safe boundaries are the area inside which the main elements like text, logos or contact details should be placed.
For Example, if your printing company requires a bleed of 0.125 inches, the background colors and images should go this distance beyond the trim edge.
Step 4: Check Front and Back Alignment
Both sides should have matching dimensions and a consistent layout.
- Keep important content away from the edges.
- Check that backgrounds and design elements extend correctly.
- Make sure the back artwork is not upside down.
- Review both pages together before exporting.
Remember that front and back designs are separate sides of the same sheet, not one continuous image.
Step 5: Use High-Resolution Images
Use clear photographs and graphics so the printed flyer does not look blurry.
A resolution of 300 DPI at the final print size is commonly recommended for photographs. Avoid enlarging small images because this can reduce their quality.
Step 6: Choose the Correct Color Mode
RGB is mainly used for screens, while CMYK is commonly used for commercial printing.
Because of the differences in the way that color is rendered on computers vs. printers, the same colors may look different after being converted from RGB to CMYK. Thus, preparing your artwork in the correct color mode can help lessen the chances of unexpected results occurring.
Step 7: Export the Artwork as a Print-Ready PDF
Export both sides into one two-page PDF.
- Page 1 should contain the front design.
- Page 2 should contain the back design.
- Include bleed and crop marks if requested.
- Check that fonts, photographs and design elements appear correctly.
- Open the exported PDF and review both pages before submitting it.
Businesses preparing artwork for Custom Flyer Printing in Los Angeles can check these details before sending their files to PrintLocker for printing.
How Does Front and Back Orientation Work in Double-Sided Printing?
Orientation determines how the back of the flyer appears when the sheet is turned over. Choosing the wrong setting can cause the back design to appear upside down.
Two common terms are:
- Flip on Long Edge: The sheet turns along its longer edge, similar to turning the page of a book.
- Flip on Short Edge: The sheet turns along its shorter edge, similar to flipping a notepad page over its top edge.
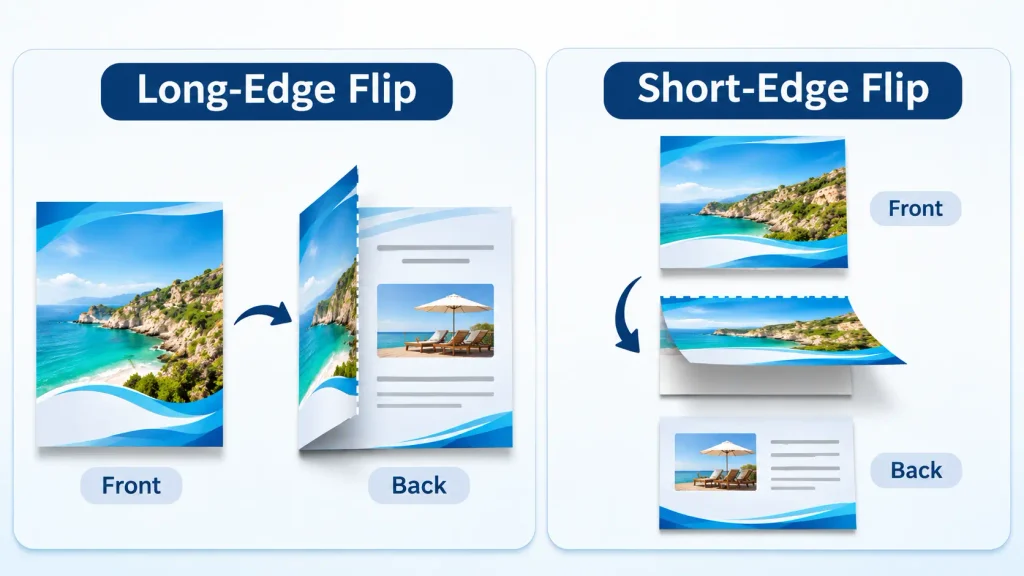
The correct option depends on the flyer dimensions, layout and intended way of viewing it. For a standard portrait flyer that opens like a book, long-edge flipping is commonly used. Other layouts may require a different setup.
Always confirm the required orientation with your printing provider. If possible, review a front-and-back proof before approving the final order.
Common Mistakes to Avoid When Preparing Double-Sided Flyer Artwork
Small file preparation mistakes can affect the finished printing result. Watch out for these common issues:
- Using different dimensions for the front and back.
- Forgetting to add the required bleed.
- Placing important text too close to the cutting edges.
- Uploading low-resolution photographs.
- Ignoring the printer’s color mode requirements.
- Exporting only one side of the flyer.
- Incorrectly orienting the back design.
- Forgetting to proofread prices, contact details and promotional information.
Reviewing the artwork before submission can save time and help prevent avoidable reprints.
How to Check Your Flyer Artwork Before Sending It for Printing
Use this checklist before approving your final design:
- Both front and back designs are included.
- Both pages have matching dimensions.
- Bleed and safe margins are correctly set.
- Images are clear and high resolution.
- Text and logos are readable.
- Colors and backgrounds are correct.
- Back-side orientation has been checked.
- The PDF opens correctly and contains both pages.
- Contact information and promotional details are accurate.
It is also helpful to review a digital proof. Check the front and back carefully before giving final approval.
Why Choose Professional Double-Sided Flyer Printing?
While creating artwork is essential; the printed quality contributes to creating the best possible flyers. Professional printing service is ideal for ensuring consistency in your promotional materials.
Businesses sometimes need promotional flyers at short notice for upcoming events, product launches, store promotions or last-minute marketing campaigns. In such situations, Same Day Flyer Printing in Los Angeles may be an option for urgent printing requirements. PrintLocker can help businesses explore available turnaround options depending on the flyer size, paper selection order quantity, artwork approval and current production capacity. Contact the team to confirm availability before placing an urgent order.
With PrintLocker, businesses can explore custom flyer printing options for different promotional requirements.
Some important printing considerations include:
- Consistent Print Quality: Clear text, photographs and colors help both sides look professional.
- Suitable Paper Options: Choose paper thickness and finishes according to your budget and intended use.
- Accurate Double-Sided Printing: Correct production setup helps ensure the front and back appear on their intended sides.
- Custom Sizes: Different flyer dimensions can suit restaurant promotions, retail campaigns, business services and events.
- Professional Presentation: Quality paper and finishing can make your promotional materials more polished.
If you are preparing an upcoming campaign, PrintLocker can help you explore suitable printing specifications for your double-sided flyers.
Proper arrangement of front and back images is an essential step in the process of creating double-sided flyers. Think through the content that goes on either side, measure it right, incorporate bleed sizes, have the image resolution checked and verify how the back side looks before saving the file as a PDF.
Although it may take time to double-check everything, it helps avoid frequent troubles when printing and ensuring successful communication of the message. If you are thinking about running a promo campaign, you can always count on PrintLocker services that offer professional flyer printing.
❓ FAQs
Q1: Should front and back flyer designs be saved as separate files?
They can be prepared as separate pages or artboards in one document. For submission, many printers prefer a two-page PDF with the front on page 1 and the back on page 2. Always follow the printer's file requirements.
Q2: What should be printed on the front and back of a flyer?
Use the front for the main headline, product image, special offer and call to action. Use the back for additional details, pricing, contact information, business address and terms.
Q3: What is the correct orientation for double-sided flyer printing?
It depends on how the flyer should be turned over. Long-edge and short-edge flipping are common options. Confirm the required orientation with your printer before submitting the artwork.
Q4: Do double-sided flyers need bleed on both sides?
Yes, if the designs include backgrounds or images that extend to the edges, both sides generally need the required bleed. Follow the printer's specifications for the exact amount.
Q5: What file format is best for double-sided flyer printing?
A print-ready PDF is commonly preferred. It can contain both sides in a single file while preserving the layout, fonts and image placement.


